1
Step 1
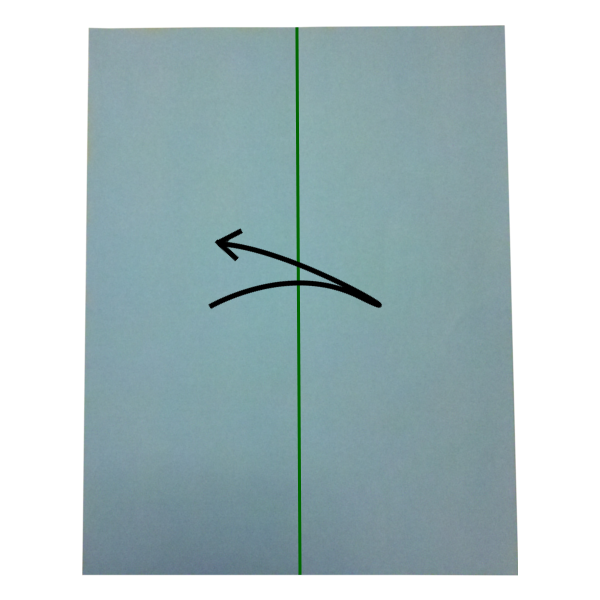
Fold the paper in half vertically and then unfold it back into its original position. After you unfold it, flip the paper over to the opposite side.
Paper Airplane Build Guide
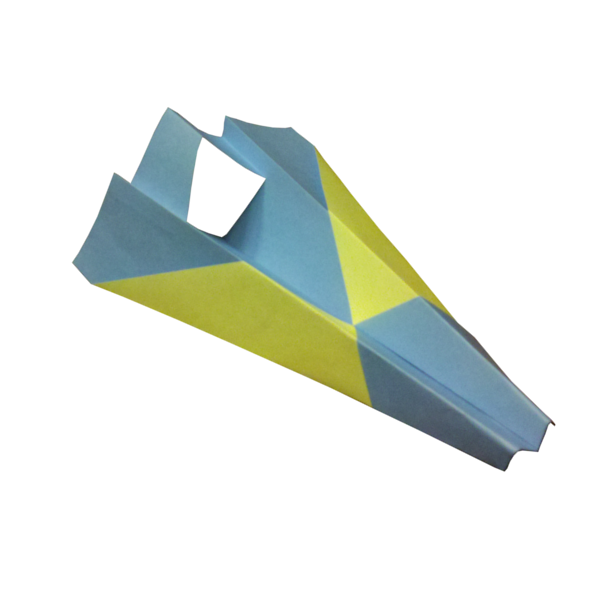
Consistency and stability were the first two words to come out of our pilots’ mouths after a long day of straight and level in this solid airframe. This is one airplane that likes to climb. Small adjustments made to the vertical stabilizer by our engineers enabled our test pilots to really get a handle on how this bird flies. After fine tuning the tail this plane flew straight as an arrow.
Build It
Follow each step in order, keep your folds sharp, and compare your airplane with the images as you go.
Step 1
Fold the paper in half vertically and then unfold it back into its original position. After you unfold it, flip the paper over to the opposite side.
Step 2
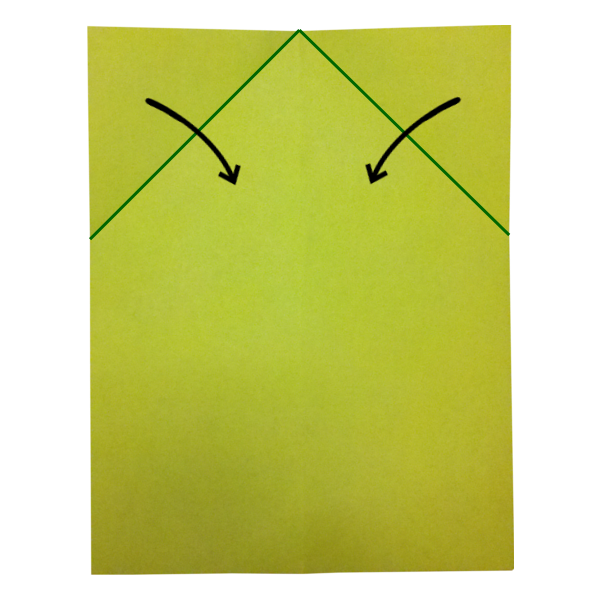
Fold the two corners of the paper airplane down towards the center fold of the airplane. Once you make these two folds flip the sheet of paper over to the opposite side once again.
Step 3
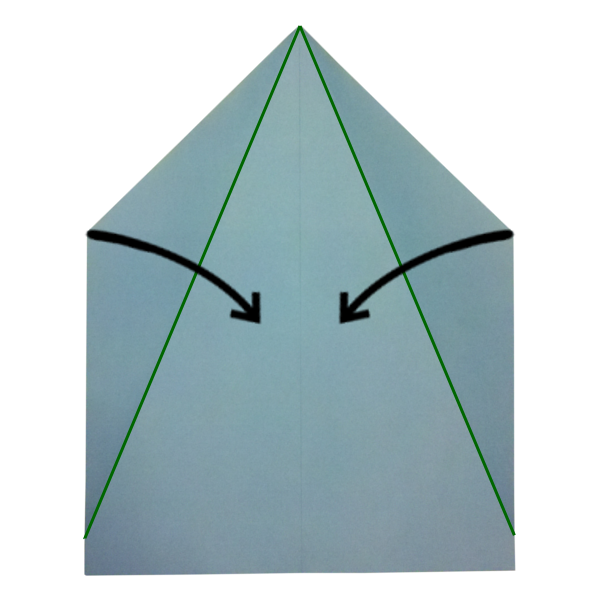
Fold the two corners in once again so that they meet flush on the center vertical fold from Step 1.
Step 4
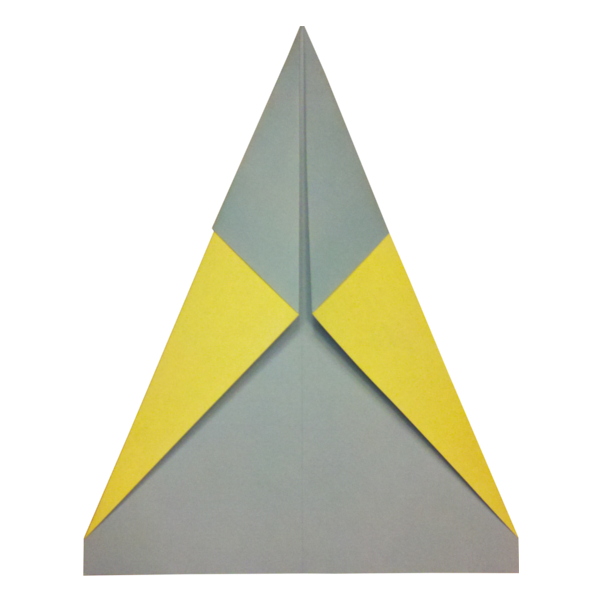
This is what the airplane should look like at this point. Now flip the airplane over to the opposite side once again.
Step 5
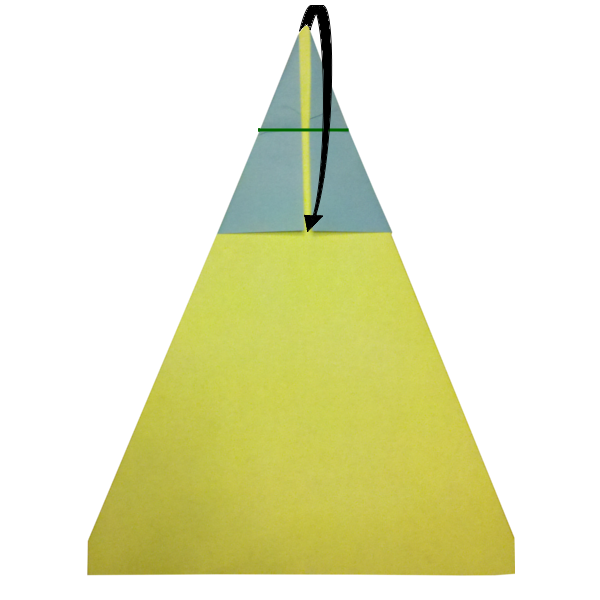
Fold the nose of the airplane down so that it touches the center fold between the two corner folds that we made in Step 4.
Step 6
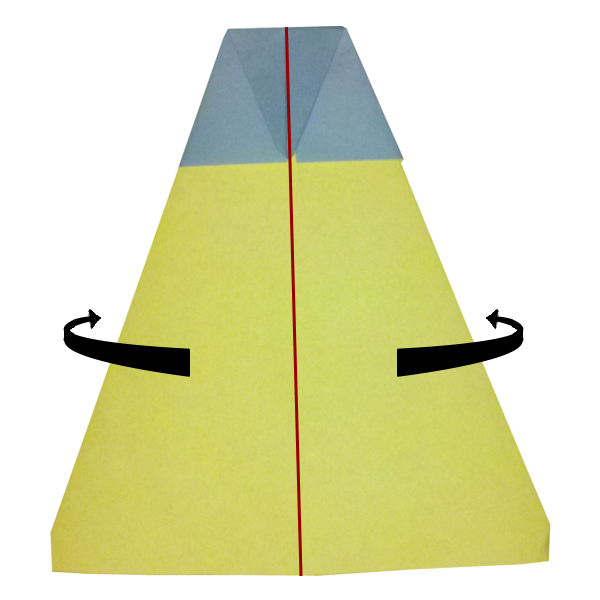
Fold the airplane back in half vertically.
Step 7
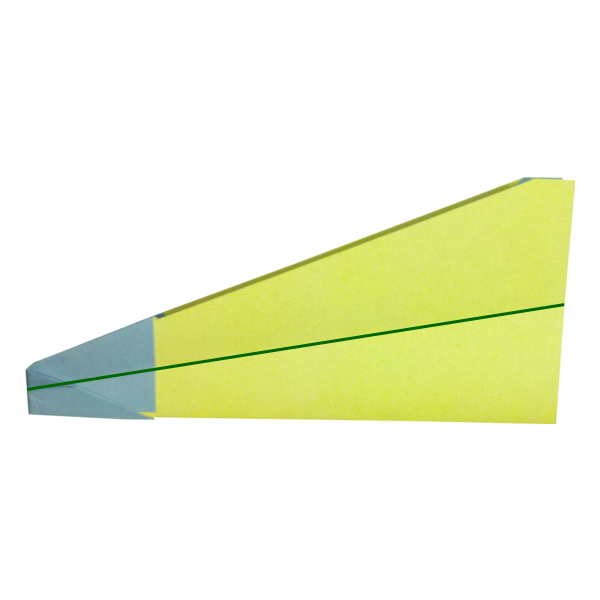
Fold each wing down so that the leading edges of the wings meet flush with the bottom of the fuselage.
Step 8
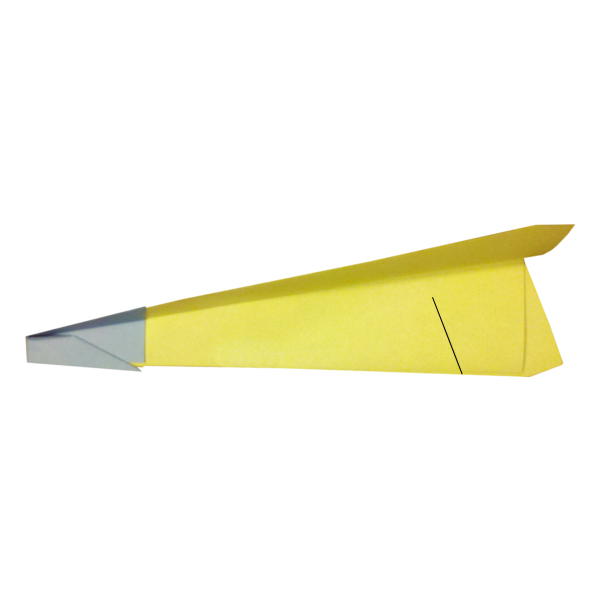
After you fold the wings of the airplane, fold them back up to get a good look at the side of the fuselage. Make a cut with scissors about one inch in from the tail of the fuselage. Angle the cut as shown in the image.
Step 9
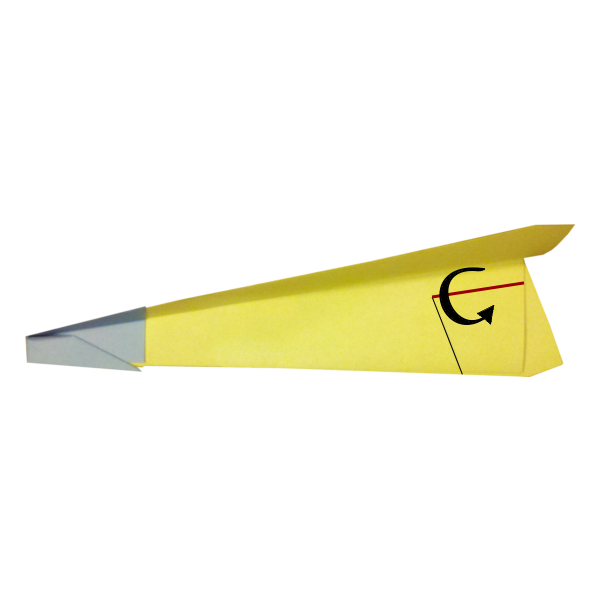
After you make the cut in the fuselage, fold the vertical stabilizer along the line shown in the image. The line should be parallel to the bottom of the wing. Do this on each side of the fuselage.
Step 10
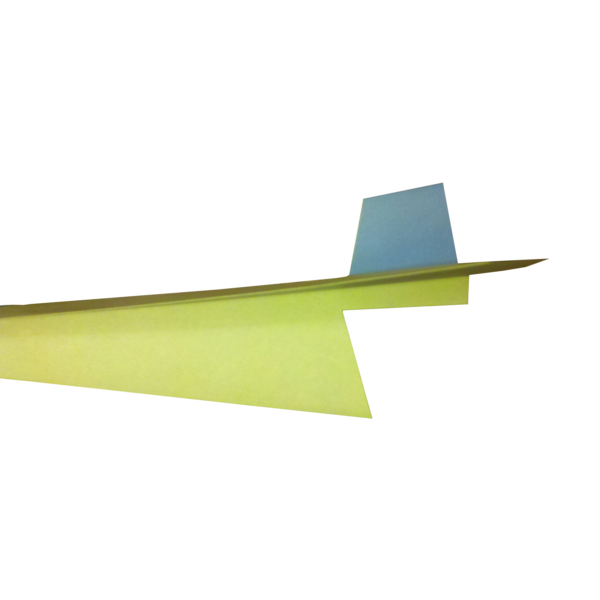
This is what your airplane should look like once you fold the vertical stabilizer up from Step 9.
Ready for Takeoff?
Give it a test flight. Small adjustments to the wings and winglets can make a big difference in how it flies.
Build Another Plane