1
Step 1
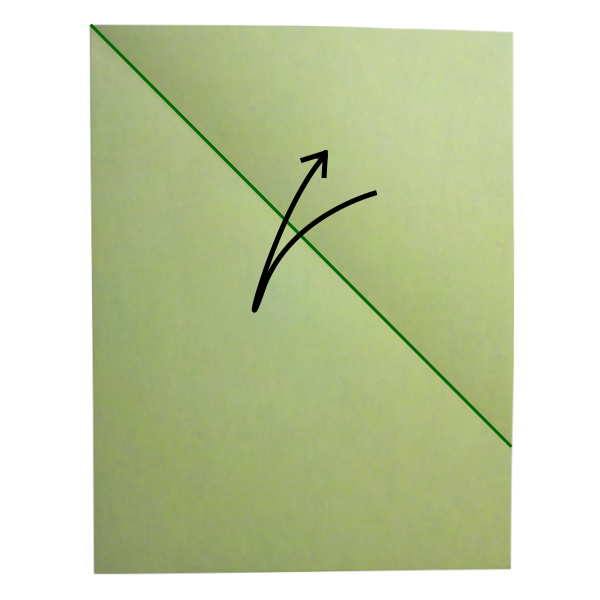
Fold the sheet of paper diagonally from the top righthand side to meet the left edge of the sheet of paper. Then unfold the paper back into its original position.
Paper Airplane Build Guide
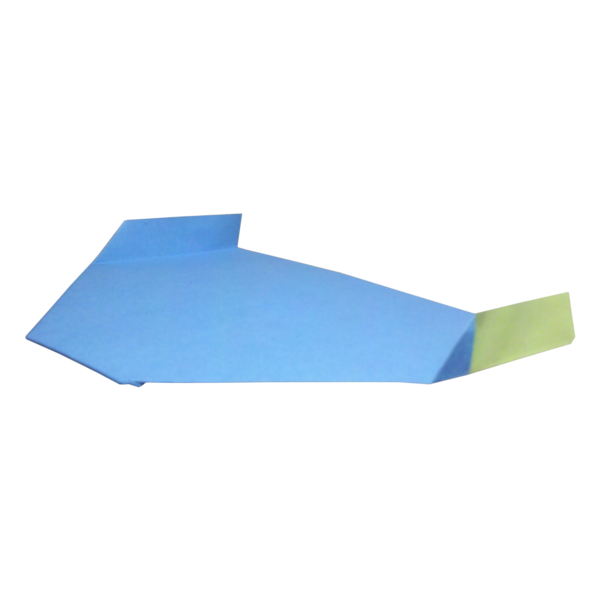
Excellent glider that performs with a surprising amount of manueverability and is designed with the flexibility to customize flight trajectories.
Build It
Follow each step in order, keep your folds sharp, and compare your airplane with the images as you go.
Step 1
Fold the sheet of paper diagonally from the top righthand side to meet the left edge of the sheet of paper. Then unfold the paper back into its original position.
Step 2
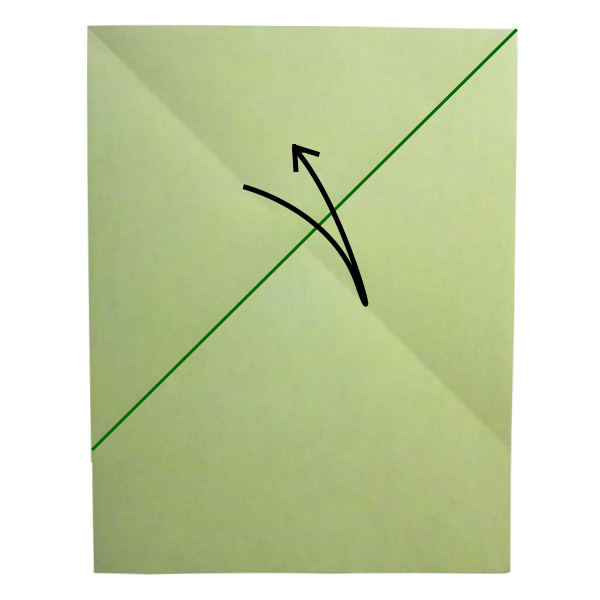
Repeat step 1 on the opposite side. Fold the sheet of paper diagonally from the top lefthand side to meet the right edge of the sheet of paper. Then unfold the paper back into its original position.
Step 3
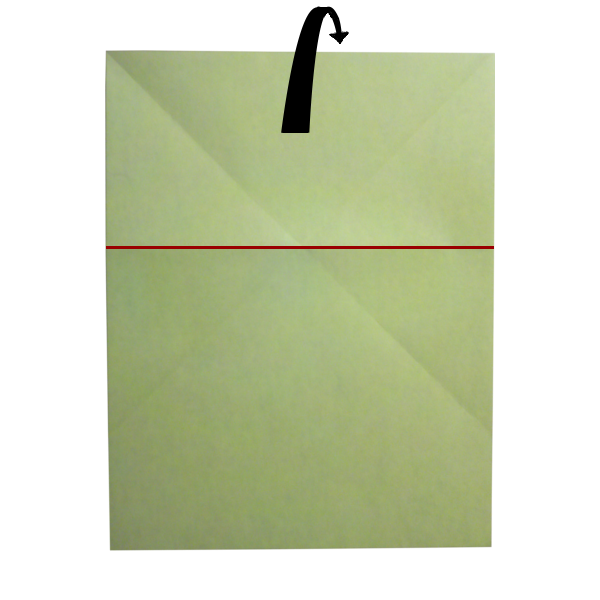
Make a horizontal fold where the two previous diagonal folds meet in the center. Fold the top section of the paper back as shown in the picture. After this fold is completed unfold the paper into its original positon.
Step 4a
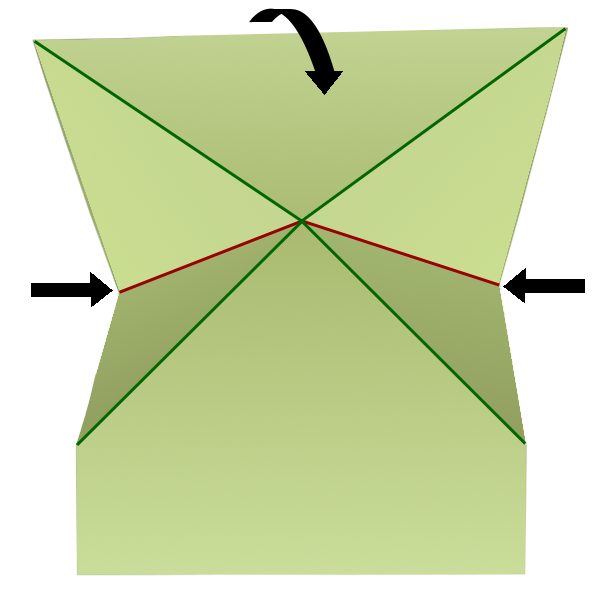
Fold the left and right sides of the sheet of paper up and toward each other. At the same time fold the top edge of the paper down so that it forms a triangle as shown in Step 4d. Steps 4b-4d will help guide you through this difficult fold.
Step 4b
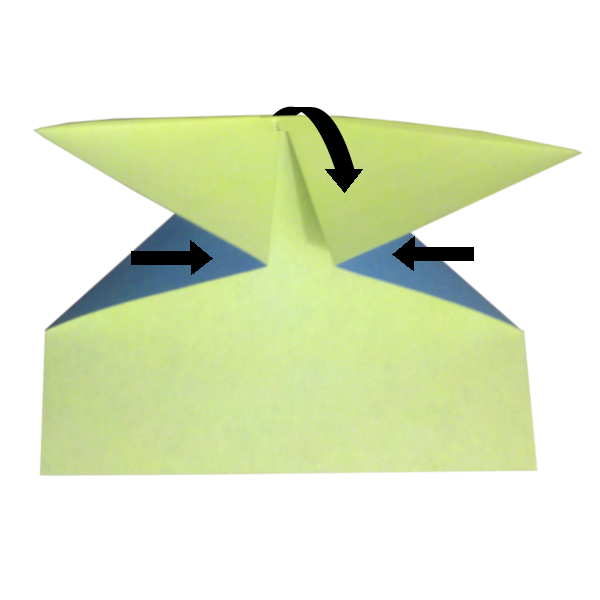
This is a continuation from Step 4a to show the continuation of the fold. See Step 4c-4d for further instruction.
Step 4c
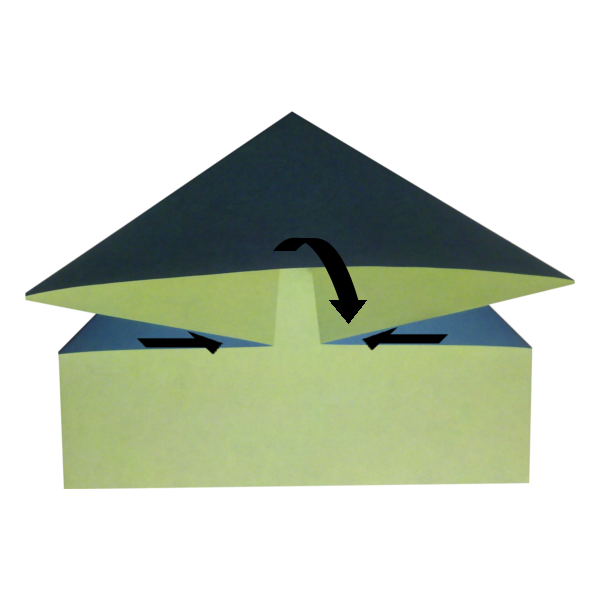
Another image to further demonstrate the complicated fold.
Step 4d
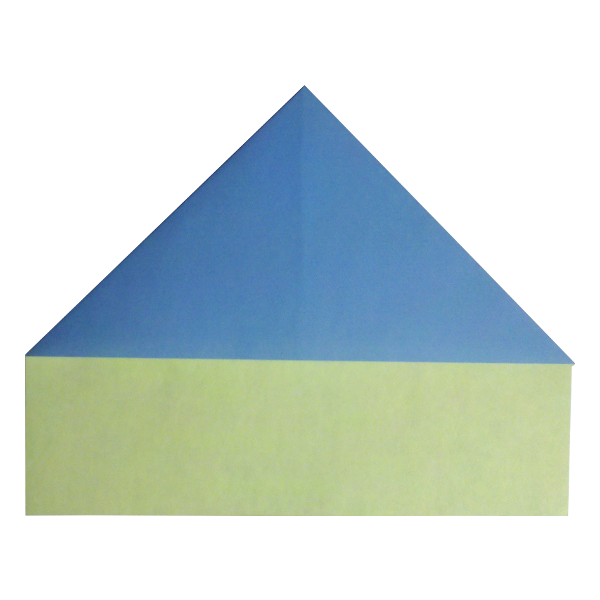
This is what you should end up with after completing the fold from Steps 4a-4c.
Step 8
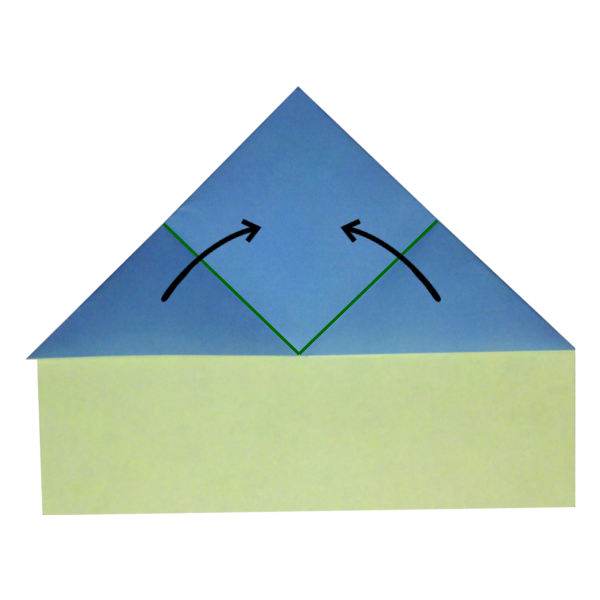
Fold the left and right tips up together so that they meet directly in the center point at the top of the airplane.
Step 9
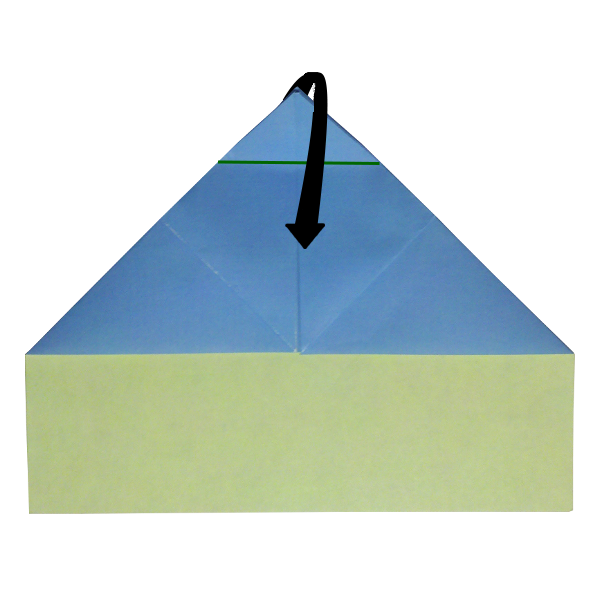
Fold the tip of the aircraft down as depicted in the image.
Step 10
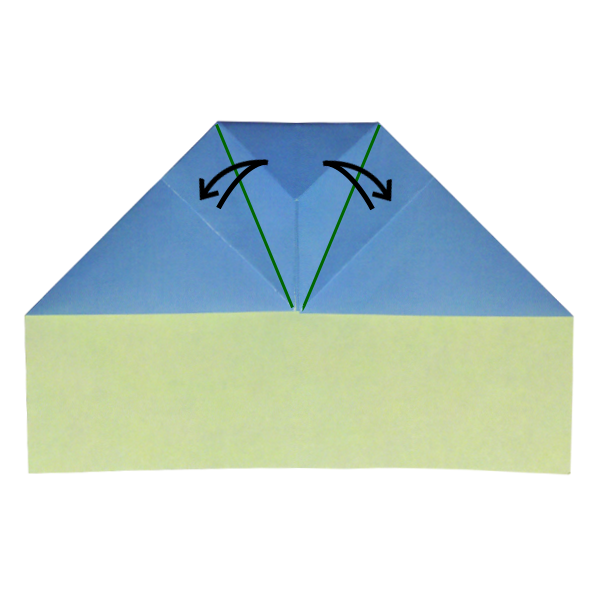
Fold the left and right tip in as shown in the image so that the left and right edges meet directly in the center of the airplane. After you complete the fold, unfold back into its original position.
Step 11
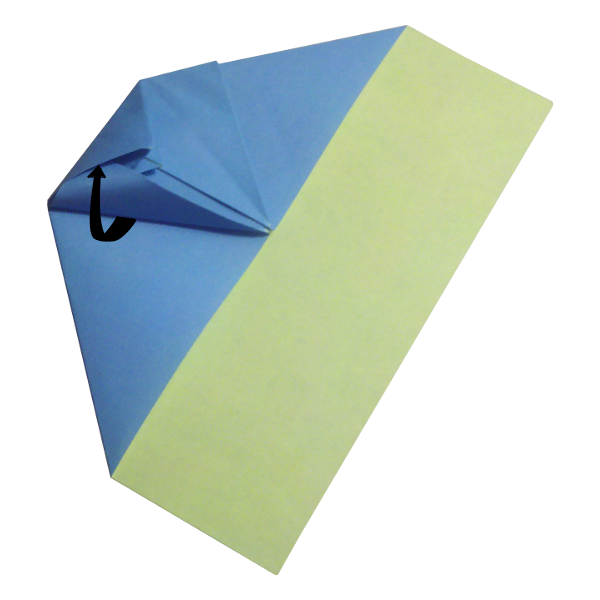
Fold the flap into the pocket that we have created on the nose of the airplane as shown in the picture. Repeat this same step for the other side then flatten.
Step 12
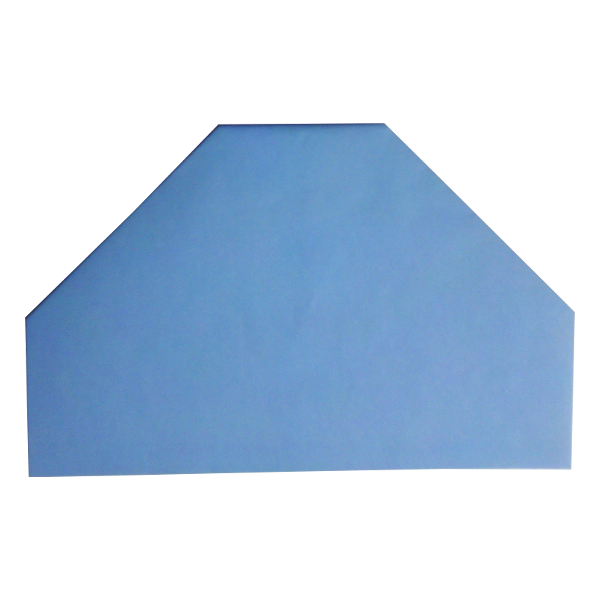
At this point the plane will fly. If you would like to put winglets on the Bat please move on to Step 10.
Step 13
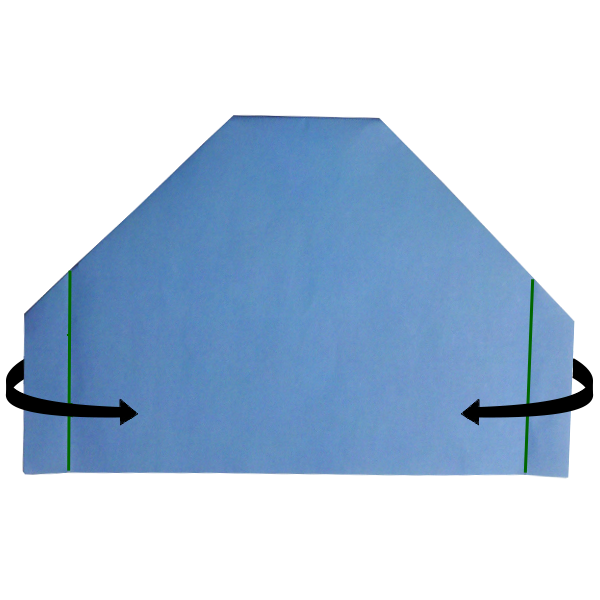
Fold the wingtips up vertically to create winglets for your airplane. A good distance to create your fold is about a 1/2 inch in from the wingtip. Make adjustments as you see fit.
Step 14
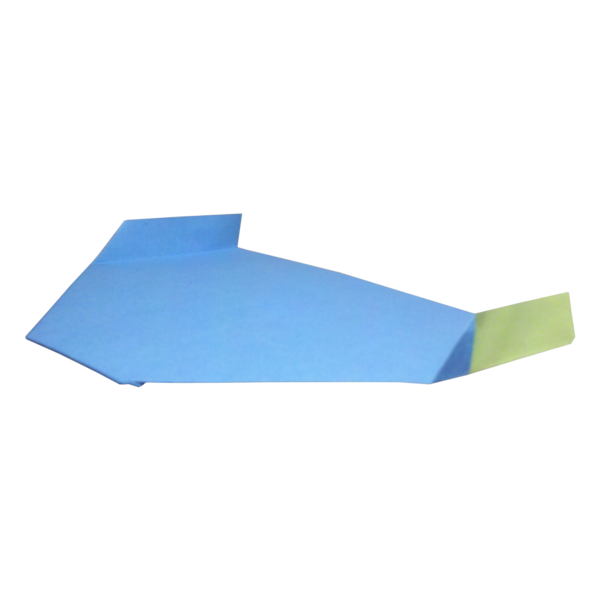
The Bat is an Excellent glider that performs with a surprising amount of manueverability and is designed with the flexibility to customize flight trajectories.
Ready for Takeoff?
Give it a test flight. Small adjustments to the wings and winglets can make a big difference in how it flies.
Build Another Plane